My first flutter app
Create and run your first Flutter application
Overview
- Flutter Create
- Code the application
- Launch the application
- Hot Reload
- Stop the process
- Add Dependencies
Flutter Create
The flutter create command is used to create a new Flutter project and sets up the initial project structure.
Basic Usage
The basic usage of the flutter create command is as follows:
flutter create <project_name>
Where <project_name> is the name of your Flutter project. Running this command will create a new Flutter project in a directory with the same name as the project.
Create your project
To begin working with this course, create your first project by running the basic create command that follows in your terminal
flutter create my_application
NOTE: Other Advanced Options
In addition to the basic usage, the flutter create command has a number of advanced options that allow you to customize the project structure and configuration.
Here are some of the most commonly used options:
--org: Specifies the package name for your application. For example, if you specify--org com.example, your application will be located atcom.example.<project_name>.--template: Specifies the template to use for your project. Flutter supports a number of templates, such asappandmodule. By default,flutter createwill use theapptemplate.--ios-language: Specifies the language to use for the iOS portion of your project. By default,flutter createwill use Swift.--android-language: Specifies the language to use for the Android portion of your project. By default,flutter createwill use Java.--project-name: Specifies the name of the project. By default, the name of the project will be the same as the name of the directory.
Coding the Application
Update the codebase
Replace the contents of lib/main.dart with the code below
import 'package:flutter/material.dart';

void main() {
  runApp(const MyApp());
}

class MyApp extends StatelessWidget {
  const MyApp({super.key});

  @override
  Widget build(BuildContext context) {
    return const MaterialApp(
      title: 'Flutter Demo',
      home: MyHomePage(),
    );
  }
}

class MyHomePage extends StatelessWidget {
  const MyHomePage({super.key});

  final name = "World";

  @override
  Widget build(BuildContext context) {
    return Scaffold(
      body: Column(
        children: [
          Text('Hello $name'),
        ],
      ),
    );
  }
}
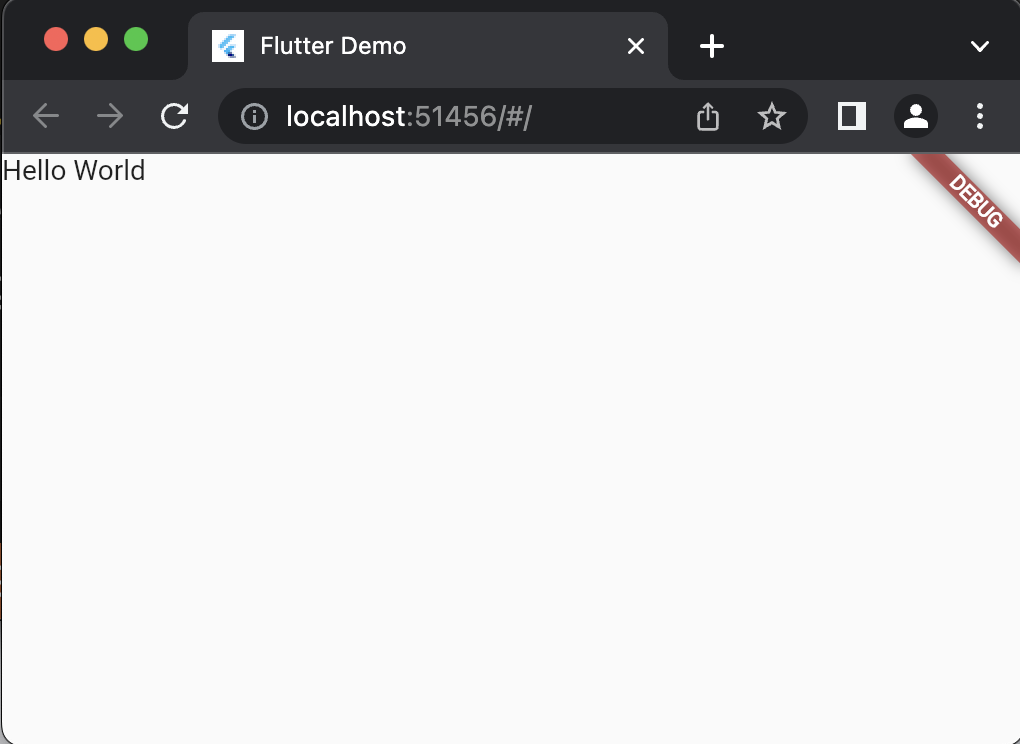
Launch the application
While lib/main.dart is open use the key combination of function+f5 to launch the application
Note: The clicking on the device name in the status bar allows you to select which device to use when launching the application. In the image below, Chrome is selected and the app will launch as a web application

Launching the application will display a result similar to the following.
Hot Reload
Without closing the running application, go back to the source code and change the text from Text('Hello $name'), to Text('Goodby $name')
When you save the file (ctrl+s) the running application will update with the new text.
Stop the process
To stop the debug process locate the debug controls at the top of VSCode and click the stop button (red square)
